Creating Your First Mod
This guide walks you through creating a mod from scratch using the ModKit wizard.
Step 1 — Open the Wizard
In the Editor toolbar: ModKit → Create Mod
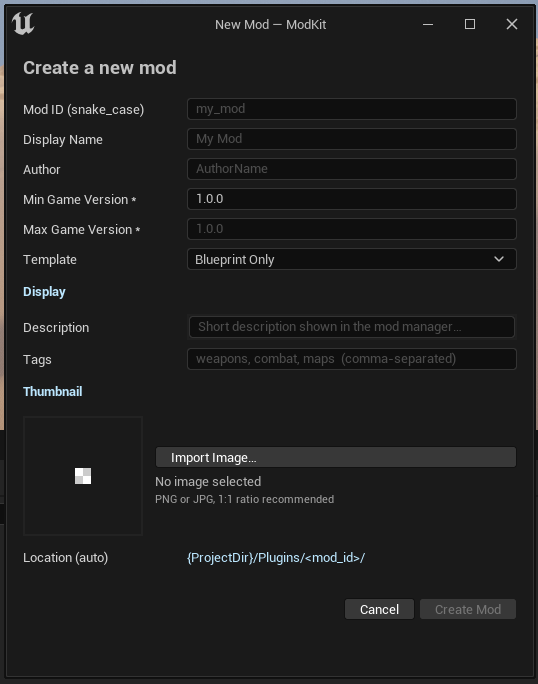
Step 2 — Fill In the Details
| Field | Description | Example |
|---|---|---|
| Mod ID | Unique identifier, lowercase + underscores | my_awesome_mod |
| Display Name | Human-readable name shown in the mod manager | My Awesome Mod |
| Author | Your name or studio name | YourName |
| Version | SemVer string | 1.0.0 |
| Min Game Version | Minimum game version required (required) | 1.0.0 |
| Max Game Version | Maximum game version supported (required) | 1.9.9 |
| Description | Short description shown to players | Adds new weapons |
| Tags | Comma-separated tags for categorization | gameplay, weapons |
| Thumbnail | Path to a 256×256 image (optional) |
The Mod ID is used as the plugin folder name and as a unique identifier in the mod ecosystem. You cannot change it after creation without breaking updates for existing users. Choose carefully.
Step 3 — Click Create
ModKit will:
- Create a plugin folder at
{YourProject}/Plugins/{ModId}/ - Generate a
.upluginfile - Create a
ModDescriptor.jsonwith your metadata - Create an empty
ModContributions.jsonand aContent/folder - Auto-register the plugin in the UE Plugin Manager
Step 4 — Add Your Content
Your mod plugin is now live in the Editor. Add content under Content Browser → Plugins → {Your Mod Name}:
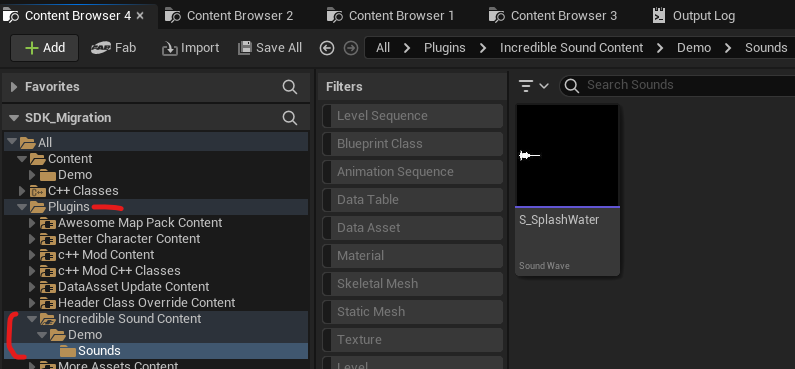
- New assets — create Blueprints, textures, meshes, sounds, etc. under your plugin path
- Asset overrides — import replacement assets at the same paths as the originals (check the game's mod documentation)
- DataTable additions — create DataTable assets that mirror the game's table structure
Always save your mod assets under /Plugins/YourModId/ — never under /Game/. Assets in /Game/ are part of the host project and won't be included in your mod PAK.
Your Mod's File Structure
{ProjectDir}/Plugins/my_awesome_mod/
├── my_awesome_mod.uplugin         # UE plugin descriptor
├── ModDescriptor.json             # Mod metadata (editable via ModKit → Edit Mod)
├── ModContributions.json          # Contributions declarations (optional)
└── Content/
    └── ...                        # Your mod assets
Editing Metadata After Creation
Use ModKit → Edit Mod → {Your Mod} to update metadata without editing JSON files directly.
Next Steps
→ Adding Contributions — Declare class overrides or DataTable merges
→ Building & Packaging — Package your mod to a .pak file